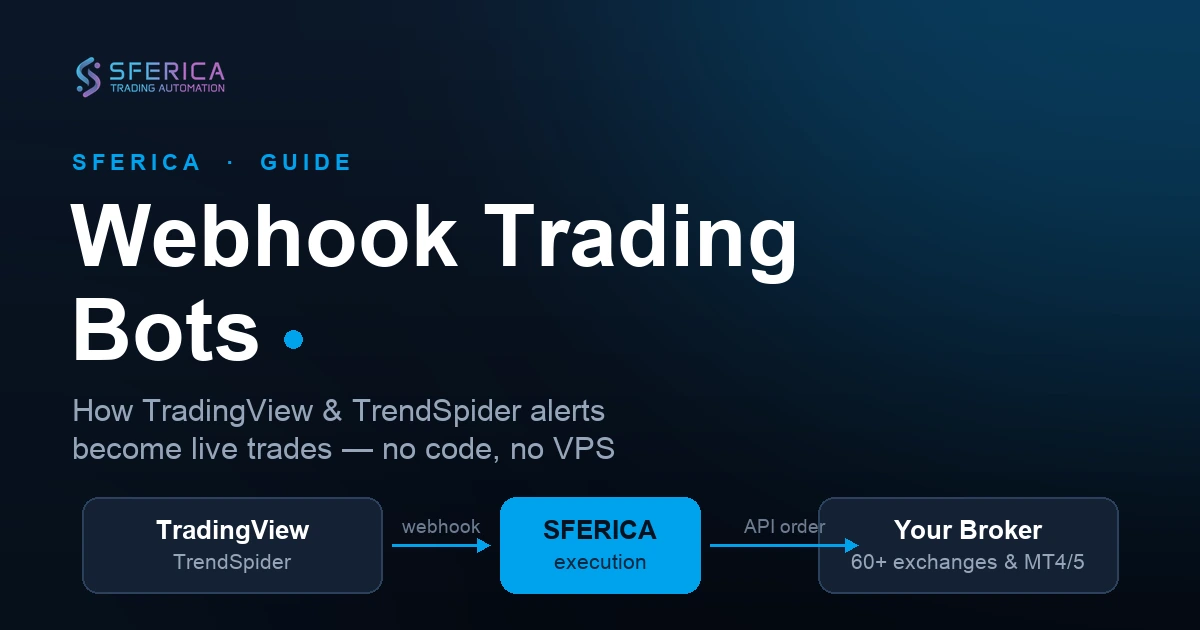
Automate Futures Trading on OKX: A Step-by-Step Setup Guide
Published on: December 22, 2025
TL;DR: Connect your OKX futures account to automated execution in under 20 minutes. This guide covers API key creation, permission settings, and webhook configuration—everything you need to run strategies 24/7 without manual intervention.
Why Automate Futures on OKX?
OKX processes billions in daily derivatives volume. It's become the default exchange for serious crypto futures traders. But here's the problem: markets don't sleep, and neither should your strategies.
I've watched traders miss perfect entries because they were asleep during Asian session moves. Others panic-exit positions when volatility spikes, abandoning their system at exactly the wrong moment. Automation solves both problems. Your rules execute with zero emotion, zero hesitation, every single time.
The technical barrier used to be high. Not anymore. Modern automation platforms have reduced the setup process to minutes, not days.
The Real Challenge (Hint: It's Not the Code)
Most traders assume the hard part is building the strategy. It isn't.
The real friction points are elsewhere. First, API permissions. OKX's permission system is granular, which is good for security but confusing if you've never done this before. Get one setting wrong and your orders silently fail. Second, account mode selection. OKX supports multiple margin modes, and your automation needs to match what you've configured in the web interface. Third, the passphrase requirement. OKX adds an extra authentication layer that trips up traders migrating from other exchanges.
None of these are difficult once you understand them. But they're where 90% of failed setups originate.
Setting Up OKX API Keys Correctly
The process is straightforward when you follow the exact sequence.
Here's what happens when you rush: traders enable withdrawal permissions "just in case," leave IP restrictions open indefinitely, or forget to save their passphrase. All preventable mistakes.
Prerequisites
Have a verified OKX account with KYC and be logged in.
Have 2FA enabled (email / SMS / authenticator), since it is required when confirming API key creation
Access the API Management Panel
Log in to OKX (desktop browser works best).
Click your profile icon (top right) and choose API / API keys / API Management from the dropdown.
Click Create API Key (or Create API).
Choose Purpose:
“API trading”
Set basic info:
API name / label (e.g. SfericaTrading API KEY).
Create a passphrase (you must remember this; it cannot be recovered).
Configure permissions according to your use case:
Read: needed for balances, positions, history.
Trade: needed to place/cancel orders via your bot.
Withdraw: generally keep off unless you absolutely require programmatic withdrawals; usually not needed for bots since enabling it creates unnecessary risk..
(Optional but recommended) Set IP allowlist to your server’s IPs so the key only works from those addresses, for Sferica you'll need to whitelist this address: http://217.160.238.76.
One critical note: API keys without IP restrictions and with trade permissions expire after few days of inactivity. This catches traders off guard when they return from vacation to find their automation dead.
Confirm creation by passing email/SMS/2FA codes as requested.
Copy and securely store:
API key
Secret key (shown only once)
Passphrase
Save Everything
Once you confirm creation, you'll see three values: API Key, Secret Key, and your passphrase. Copy all three immediately. OKX displays the Secret Key exactly once. Lose it and you're creating a new key from scratch.
Registering Your API on Sferica
With your credentials ready, the platform connection takes under two minutes. In Sferica's dashboard, navigate to Sferica Connector and click "Create New" (or go directly to link).
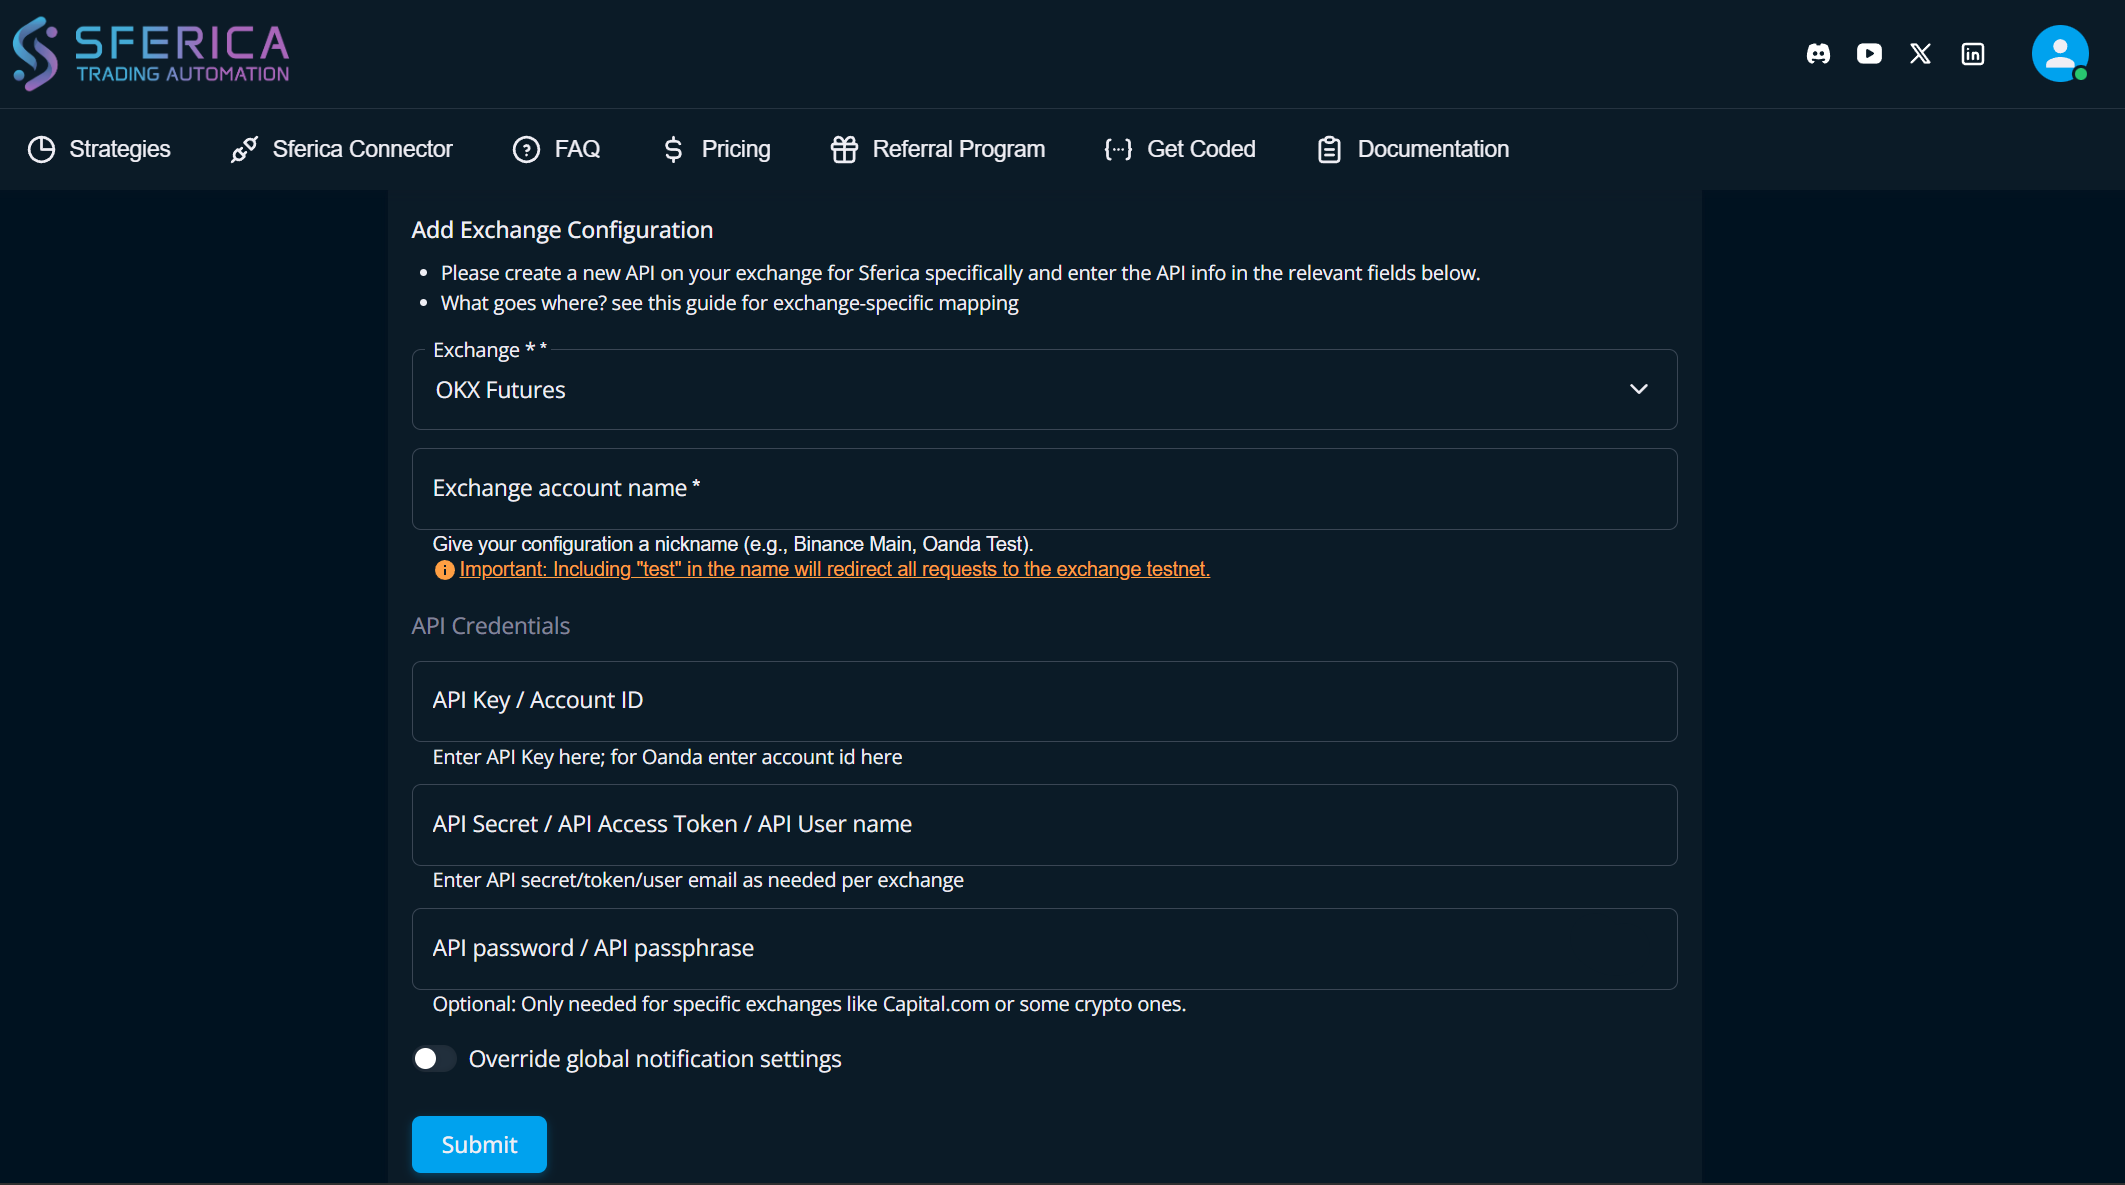
Select OKX from the exchange dropdown. You'll see fields for API Key, Secret Key, and API Password, that last one is your passphrase. Map each credential to the correct field. Give the configuration a nickname like "OKX Futures Main" so you can identify it later.
After saving, Sferica redirects you to the configurations listing page. Here's the important part: Sferica generates a unique Pointer ID for this configuration. This Pointer is what links your TradingView alerts to this specific exchange connection. You'll need it in the next step.
If connection fails, check these in order: passphrase spelling (case-sensitive), API key permissions (must include Trade), and account mode (must be Unified for futures).
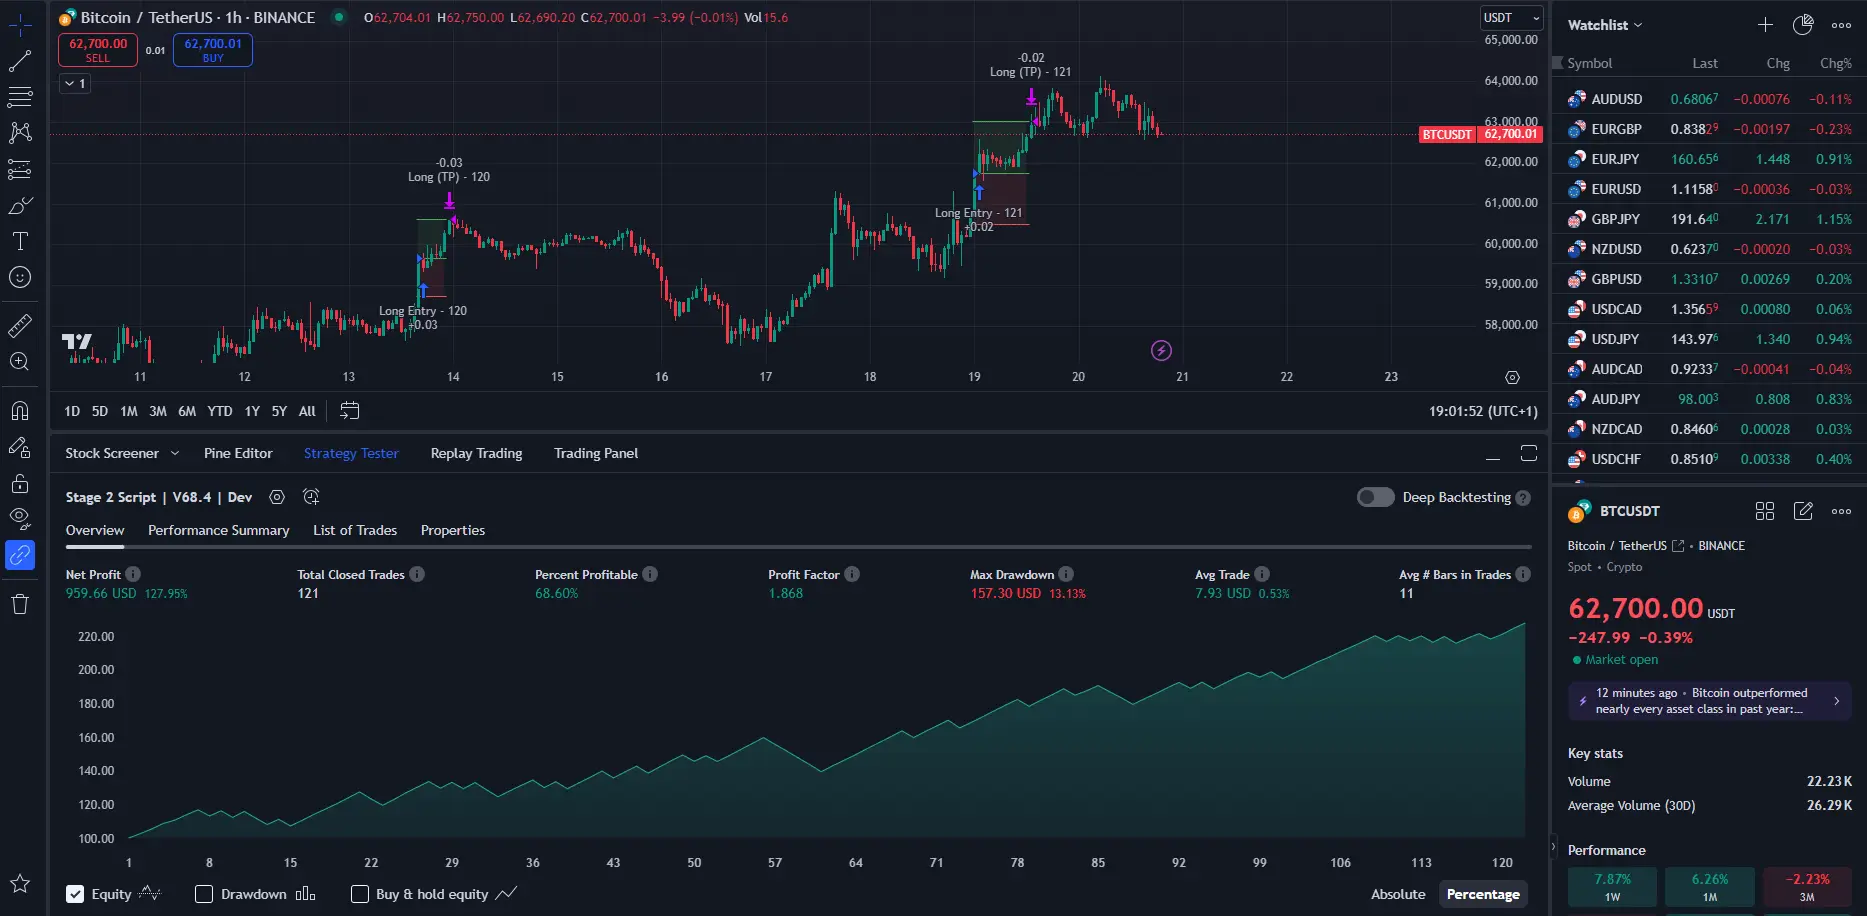
Setting Up TradingView Strategy Alerts
The connection between TradingView and Sferica works through webhooks, HTTP requests that fire instantly when your strategy generates a signal. Here's the exact setup process.
Copy Your Standard Alert Message
Go to the Sferica Connector section in Sferica. Find the exchange configuration you just created and copy its "Standard alert message." This pre-formatted message includes your unique Pointer ID and handles all the payload formatting automatically.
Configure Your Strategy
Open your strategy on TradingView and apply it to the correct ticker with your desired parameters. If possible, start when the strategy isn't in an open position, cleaner for initial testing.
Click the three dots next to your strategy's name on the chart and select "Add alert on [Your Strategy Name]."
Alert Settings
In the alert configuration window, select your strategy name under "Condition." If the option exists, choose "Order fills only", this ensures alerts trigger only on actual simulated order fills, not on every bar or condition change. Fewer false signals, cleaner execution.
In the "Message" field, delete any existing content and paste the entire standard alert message you copied from Sferica.
Webhook Configuration
Navigate to the "Notifications" tab within the alert settings. Check the box for "Webhook URL" and enter Sferica's alert processing server:
http://217.160.238.76
Optional but useful for testing: enable "Notify on app" to receive a copy of each alert yourself. This helps verify that alerts trigger with the correct data before you trust it with real positions.
Click "Create" to activate the alert. Your TradingView strategy now routes directly to your OKX account through Sferica.
One detail worth noting: TradingView requires a paid plan (Plus or higher) for webhook alerts. The free tier only supports email notifications, which add latency and complexity to automation flows.
Anti-Patterns to Avoid
A few mistakes I see repeatedly:
❌ Over-leveraging from day one. High leverage amplifies both gains and errors. Run your first week at conservative settings until you've verified everything works correctly.
❌ Testing in live markets. OKX offers demo trading with paper money. Use it. Create separate API keys for demo trading (under Trading → Demo Trading) and validate your entire flow before risking capital.
❌ Ignoring rate limits. OKX throttles API requests, roughly 10-20 per second depending on endpoint. Strategies that fire rapid-succession signals will hit limits and miss executions.
❌ Leaving positions unmonitored. Automation doesn't mean abandonment. Check daily that your system is running, positions match expectations, and no errors are accumulating.
❌ Wrong Pointer ID. If you have multiple exchange configurations in Sferica, make sure your TradingView alert message contains the Pointer for the correct account. Copying the wrong standard alert message routes trades to the wrong exchange.
Key Takeaways
- OKX API keys for futures require Read + Trade permissions on a Unified Account
- Never enable Withdraw permissions for automation keys
- Save your passphrase immediately, OKX shows it exactly once
- Start with minimum position sizes until you've verified execution flow
- TradingView webhooks require a paid subscription
The Bigger Picture
Automation isn't about removing yourself from trading entirely. It's about executing consistently, without the emotional overhead that causes most traders to deviate from profitable systems.
The technical setup takes twenty minutes. The discipline to let your system run without interference? That's the harder part. But it starts with getting the plumbing right.
Further Reading
- OKX API Documentation — Official reference for authentication and endpoints
- TradingView Webhook Configuration — TradingView's official webhook guide
- Sferica Strategy Library — Pre-built automated futures strategies
Ready to Automate Your Trading?
Explore our plans and start your 14-day free trial today.
View PricingTable of Contents
- Why Automate Futures on OKX?
- The Real Challenge (Hint: It's Not the Code)
- Setting Up OKX API Keys Correctly
- Prerequisites
- Access the API Management Panel
- Save Everything
- Registering Your API on Sferica
- Setting Up TradingView Strategy Alerts
- Copy Your Standard Alert Message
- Configure Your Strategy
- Alert Settings
- Webhook Configuration
- Anti-Patterns to Avoid
- Key Takeaways
- The Bigger Picture
- Further Reading